
Create a web checkout
Learn how to create a hosted web checkout, explore its built-in pages, and copy existing checkouts.
Web checkouts are securely hosted websites that display your product information to customers for purchase. Each store can include multiple web checkouts, each configured with unique products and branding to support different checkout experiences.
Understand your default checkout and how it affects the Account Management portal.
Learn how homepage, product, payment, and completion pages work.
Set up a new checkout and manage its online status.
Duplicate an existing checkout to reuse settings and products.
Default checkout
Each store includes a default web checkout that controls the appearance and styling of your buyers' Account Management portal. FastSpring labels this checkout with a Default tag in the upper-right corner of the Web Checkouts list.
Note: If you need to change which checkout serves as the default, contact FastSpring Support.
Page types
Each web checkout includes a series of built-in pages that guide the buyer from browsing to order completion. You can customize each page's content and design in the Web Checkout settings to match your brand and buyer experience.
Displays all products linked to your checkout. You can feature main and secondary catalogs, apply discounts, or add upsell and cross-sell offers.
Shows detailed product information such as name, description, price, discount, and images. You can link directly to product pages from your website.
Opens when a customer clicks Buy Now. Buyers enter contact and payment details in a secure popup to complete their purchase.
Displays order confirmation details, fulfillment instructions, and the buyer's reference number after a successful purchase.
Homepage (catalog)
The homepage lists all products associated with your checkout. You can organize multiple products into main or secondary catalogs and apply product offers to encourage higher-value purchases.
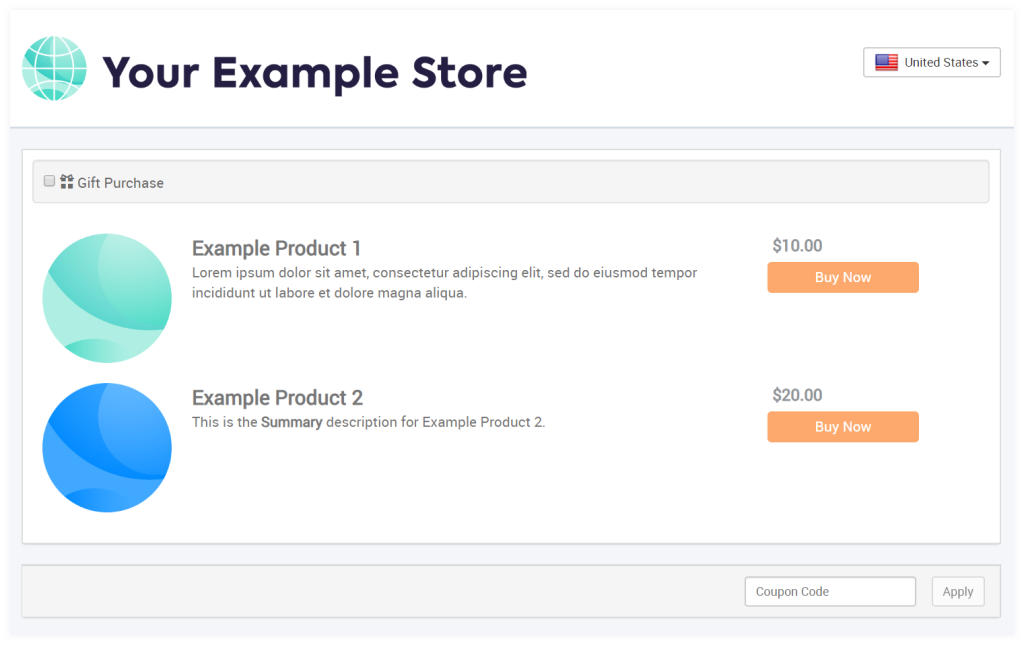
Tip: Use the homepage to showcase discounts, featured products, or upgrade paths directly from the product catalog.
Product page
Each product page displays the following information:
- Product display name
- Short and long descriptions
- Price and any active discounts
- Product image
You can link to product pages directly from your website. When a buyer accesses a product page, the product is preselected for purchase, and customers can proceed directly to checkout. You can also include product offers or product options to display upgrades or add-ons.
Note: Web checkouts do not retain cart contents between sessions. To support a persistent cart, use a popup checkout or popup checkout cart.
Payment window
After a customer clicks Buy Now, a secure popup window prompts them to enter their contact and payment information for checkout. FastSpring processes the transaction and automatically delivers any configured fulfillments. Once payment succeeds, the buyer is redirected to the completion page.
Completion page
After a successful transaction, FastSpring directs the buyer to a confirmation or completion page. This page displays the following information:
- Order reference number
- Fulfillment and license details
- After-purchase instructions
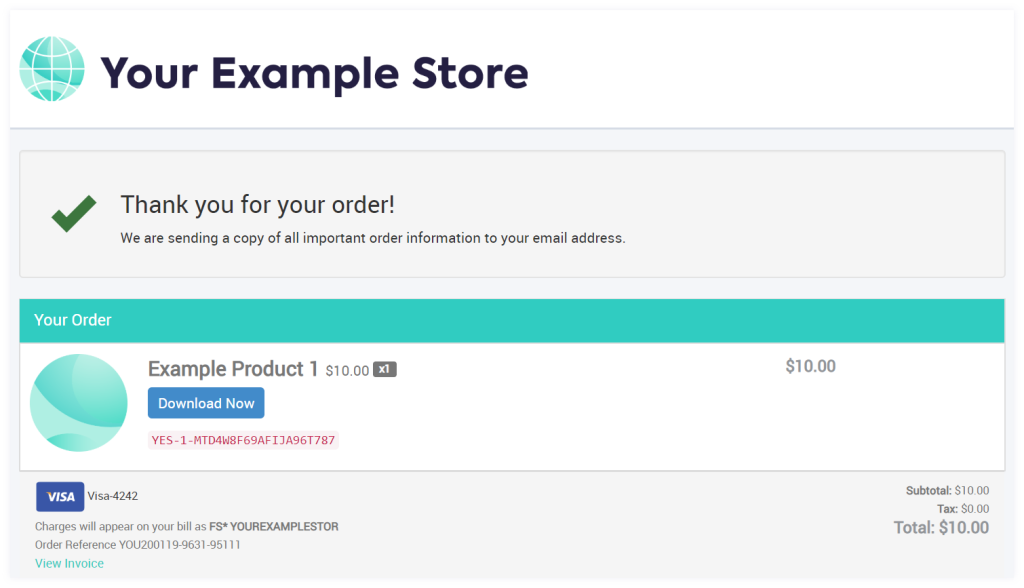
Tip: Customize the completion page text and layout in your checkout settings to reinforce brand messaging or link to onboarding resources.
Create a checkout
Create a new web checkout to offer a different catalog, design, or localization experience.
- In the FastSpring app, go to Checkouts > Web Checkouts.
- Click Create Web Checkout in the top-right corner. A dialog appears.
- In Company Sub-Directory Checkout ID, enter a unique ID for your checkout.
- Do not include spaces; this becomes part of the checkout URL.
- Click Create. Your new checkout appears in the list.
By default, new checkouts are Offline until your store is activated. After activation, switch the checkout to Online so customers can begin making purchases.
Tip: Test your web checkout on a non-public or staging page before setting it live for customers.
Copy a checkout
Duplicate an existing web checkout to reuse its products, layout, or branding.
- In the FastSpring app, go to Checkouts > Web Checkouts.
- Find the checkout you want to copy and click More > Copy.
- In To New Checkout URL, enter a new ID for the duplicate checkout.
- Do not include spaces; this becomes part of the new checkout's URL.
- Do not use the To Existing Checkout dropdown unless you intend to overwrite an existing checkout.
- Click Finish. The new checkout appears in your list.
Updated 8 months ago