
Create a popup checkout
Learn how to create a popup checkout and choose a theme that fits your brand.
Popup checkouts open directly over your site, allowing customers to complete purchases without leaving the page. You can create multiple popup checkouts, each with unique products, branding, and configurations.
Use the steps below to create your popup checkout and select a theme that fits your site’s design.
Create your popup checkout
Create a new popup checkout to display products directly on your site.
- In the FastSpring app, go to Checkouts > Popup Checkouts, then click Create Popup Checkout (top-right).
- In the Company Sub-Directory Checkout ID field, enter a unique ID for your new checkout.
- This ID becomes part of your checkout URL.
- Avoid spaces or special characters.
- Select a Checkout Theme:
- Default: Bright, classic interface.
- Dark: Low-light, modern interface.
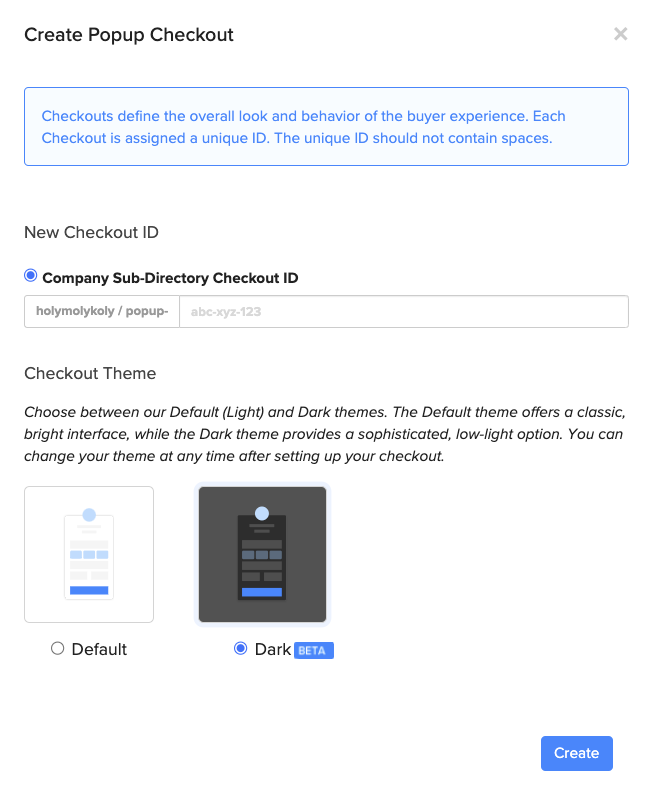
Note: Each theme maintains its own configuration. Switching themes does not transfer settings between them.
- Click Create. Your new popup checkout appears on the Popup Checkouts page.
Preview your popup checkout
After creating a checkout, click Settings to open the configuration page. Use Save and Preview (top-right) to view your current setup using a sample $14.95 monthly subscription. This preview helps you confirm layout, styling, and behavior before publishing the checkout to your site.
Tip: Use preview mode to test theme differences, color contrast, and general layout before going live.
Updated 8 months ago